Grow Light Team
Indoor Vegetable Garden Ideas for Small Spaces
Indoor Vegetable Garden – What To Consider
Imagine being able to pick fresh herbs right from your kitchen window or grabbing some lettuce from a plant inside your home. This isn’t just something cool to think about—it’s something you can actually do, even if you don’t have a big garden outside. That’s what indoor vegetable gardening is all about, and it’s becoming really popular for people who live in cities or don’t have much outdoor space.
When you grow your own veggies inside, you get to be in charge of everything, like making sure they don’t get any bad chemicals on them. This way, you know your food is super healthy. Plus, it’s a smart way to use small spaces in your home to grow things like tomatoes, carrots, and herbs.
This guide, “Innovative Indoor Vegetable Garden Ideas for Small Spaces,” will show you how to start your own garden inside your home. We’ll talk about which vegetables are best for growing indoors, how to make the most of the space you have (even if it’s really small!), and how to keep your plants happy with the right light and warmth. We’ll also explain why growing your own food is good for your health and safe to eat.
So, let’s dive in and learn how to turn your home into a mini farm. Whether you’ve got a green thumb or you’re new to gardening, you’ll find tips and tricks to help you grow your own vegetables indoors. It’s going to be fun and you’ll learn a lot, so let’s get started!
The Right Plants for Your Indoor Vegetable Garden
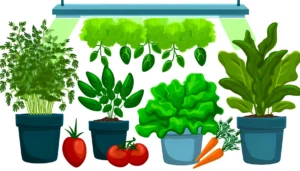
Starting an indoor vegetable garden is an exciting journey, but the first step is to choose the right vegetables to grow. Not all vegetables are suited for indoor gardening, so picking the ones that can thrive in your home’s conditions is key to a successful harvest.
1. Leafy Greens
Leafy greens like lettuce, spinach, and kale are perfect for indoor gardens. They don’t need as much light as some other vegetables, and they can grow in smaller spaces. You can start harvesting your leafy greens by picking a few leaves from each plant, which encourages more growth.
2. Herbs
Herbs are some of the easiest plants to grow indoors. Basil, parsley, cilantro, and mint require minimal space and can grow well on a sunny windowsill. Herbs add fresh flavors to your meals, and having them on hand can inspire you to try new recipes.
3. Tomatoes
Cherry or grape tomatoes are great for indoor gardening. They do need a bit of space to grow and a lot of light, but the effort is worth it when you get to eat your own sweet, home-grown tomatoes. Use a tall container or hanging basket to save space and support their vines.
4. Carrots
Carrots can be grown indoors, but they need deep pots for their roots to grow properly. Choose shorter varieties of carrots if your space is limited. Carrots require patience as they take a bit longer to mature, but the taste of fresh carrots is unbeatable.
5. Peppers
Small pepper plants, like chili or bell peppers, are suitable for indoor gardens. They need a warm spot with plenty of light to produce a good yield. Peppers add a pop of color to your indoor garden and spice up your dishes.
Tips for Success
- Lighting: Most vegetables need at least 6-8 hours of sunlight per day. If you don’t have enough natural light, consider using LED grow lights, which are efficient and can provide the spectrum of light needed for optimal growth.
- Watering: Keep the soil consistently moist but not waterlogged. Overwatering can lead to root rot. For a more hands-off approach, consider a hydroponic system, which automatically waters your plants every day, ensuring they receive the right amount of water without overdoing it.
- Fertilizing: Use a balanced, organic fertilizer to provide your plants with the nutrients they need to grow.
Growing your own vegetables indoors is a rewarding experience. Not only does it give you access to fresh produce, but it also brings the joy of gardening into your home, regardless of the season or outdoor space available. Start with these vegetables and watch your indoor garden flourish.
Space-Saving Techniques and Container Options for Your Indoor Vegetable Garden
When you’re limited by space but ambitious to grow your own vegetables indoors, creativity becomes your best tool. Here are some innovative space-saving techniques and container options that can help you maximize your indoor gardening potential.
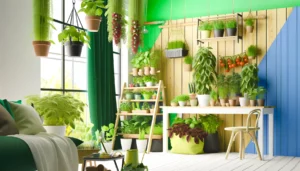
1. Vertical Gardening
One of the smartest ways to use limited space is by growing upwards. Vertical gardening involves using wall planters, shelves, or even repurposed furniture like bookshelves to stack plants on top of each other. This method not only saves floor space but also adds a unique aesthetic to your home.
2. Hanging Planters
Hanging planters can be a game-changer for indoor gardens. They utilize the often-overlooked space above. You can hang planters from the ceiling, windows, or even wall hooks. Herbs, strawberries, and smaller vegetable varieties like cherry tomatoes thrive in hanging planters.
3. Window Boxes
If you have a sunny window, make the most of it with a window box. These can be attached to the inside of your window sill and are perfect for growing herbs and leafy greens. They’re not only practical but also beautify your living space.
4. Stackable and Tiered Planters
Stackable and tiered planters are designed to grow multiple plants in a single, contained area. These containers are perfect for small vegetables and herbs, allowing you to grow more in less space. Plus, they can be easily moved to catch the sunniest spots in your home.
5. Hydroponic Systems
Hydroponic systems are soil-less gardening solutions that are perfect for indoor settings. They can be more efficient than traditional gardening, using water mixed with nutrients to feed plants directly. Many hydroponic systems are designed to be compact, making them ideal for small spaces.
6. Use of Multipurpose Furniture
Think creatively and use multipurpose furniture, like a bookshelf or a rolling cart, as a place to set up your garden. These can offer multiple levels for planting and can be easily integrated into your living space without taking up extra room.
Tips for Maximizing Space
- Opt for dwarf or miniature vegetable varieties as they require less space to grow.
- Regular pruning and harvesting keep plants manageable and can actually encourage more growth.
- Utilize reflective surfaces like mirrors to increase light exposure to your plants, making them grow better.
By implementing these space-saving techniques and choosing the right container options, you can turn even the smallest spaces into productive indoor gardens. Whether you’re living in an apartment or just have limited room, these strategies can help you grow a variety of vegetables and herbs right inside your home.
Optimizing Growth with LEG Grow Lights and Climate Control for Indoor Vegetable Gardens
Creating the perfect conditions for your indoor vegetable garden is crucial for healthy growth and bountiful harvests. Here’s how you can optimize lighting and climate control to mimic the natural environment plants love.
1. Understanding Light Requirements
Vegetables need a good amount of light to photosynthesize and produce food. Most indoor vegetables require at least 6-8 hours of direct sunlight per day. However, natural light can be limited indoors, especially in winter months or in apartments that don’t get much sunlight.
2. Using LED Grow Lights
LED grow lights are a game-changer for indoor gardening. They can provide the specific light spectrum your plants need to grow and can be used to extend the amount of “daylight” hours. LED grow lights are especially popular because they’re energy-efficient and emit less heat, making them safe to use close to plants. When setting up grow lights, ensure they’re close enough to provide light directly to the plants but not so close that they cause heat damage.
3. Climate Control
The ideal temperature for most vegetables to grow indoors is between 65°F and 75°F (18°C to 24°C). If your home is cooler or warmer, you may need to adjust the location of your garden or use a small space heater or fan to maintain the right temperature. Additionally, vegetables like a bit of humidity, but too much can lead to fungal diseases. A humidity level between 40% and 60% is usually perfect. You can use a humidifier or dehumidifier to regulate humidity levels if necessary.
4. Ventilation
Good air circulation helps prevent disease and pests by keeping the air around your plants fresh. A small fan can provide gentle air movement, mimicking the natural breezes found outdoors. Just be sure it’s not too strong to avoid stressing the plants.
5. Watering Wisely
Indoor vegetables need consistent moisture, but it’s important not to overwater them. Overwatering can lead to root rot and other problems. Use pots with drainage holes and check the soil moisture before watering. A general rule is to water when the top inch of soil feels dry to the touch.
6. Nutrient Management
Indoor plants rely on you for all their nutrients. Use a balanced, water-soluble fertilizer designed for vegetables, following the instructions on the label for frequency and amount. Be careful not to over-fertilize, which can harm the plants.
By paying attention to these key factors, you can create an indoor environment that encourages your vegetables to grow strong and healthy. Lighting and climate control are foundational to your garden’s success, so invest the time to get them right, and you’ll enjoy the rewards of fresh, home-grown vegetables all year round.
The Health and Safety Benefits of Growing Your Own Food
Growing your own vegetables isn’t just a rewarding hobby; it’s a significant step towards a healthier lifestyle. Here’s why cultivating your own indoor garden can be beneficial for your health and safety:
1. Access to Fresh Produce
Having an indoor garden means you have access to fresh vegetables anytime. Fresh produce is packed with nutrients, vitamins, and minerals essential for maintaining good health. Plus, vegetables that ripen in the garden have more nutrients than some store-bought vegetables that must be picked early.
2. Reduced Exposure to Pesticides
One of the biggest health benefits of growing your own food is the ability to control what goes on and in it. By choosing organic methods to deal with pests and diseases, you can significantly reduce your exposure to harmful pesticides and chemicals often found in commercially grown produce.
3. Promotes a Healthy Diet
Growing your own vegetables can encourage you to eat more of them, promoting a healthier diet. Having a variety of vegetables at your disposal can inspire you to experiment with new recipes and increase your vegetable intake.
4. Physical and Mental Health Benefits
The act of gardening itself is a physical activity that can contribute to a healthy lifestyle. It can reduce stress, improve mood, and even offer a sense of achievement. Indoor gardening can be especially beneficial for those with limited outdoor space, bringing nature into your home and improving your living environment.
Maintenance and Harvesting
To ensure your indoor vegetable garden thrives, regular maintenance and proper harvesting are key. Here are some tips to keep your garden in top shape:
1. Monitoring Plant Health
Keep an eye on your plants for any signs of stress, disease, or pest infestation. Early detection is crucial for addressing issues before they become serious problems.
2. Pruning and Training
Regular pruning helps to control plant size and encourages healthier growth. For vining plants like tomatoes, using supports or cages can help manage their growth and improve air circulation.
3. Watering and Feeding
Water your plants as needed, allowing the soil to dry out slightly between waterings. Overwatering can lead to root rot, so it’s important to ensure proper drainage. Feed your plants with a balanced fertilizer to ensure they receive all the nutrients they need.
4. Harvesting
Harvest your vegetables when they’re ripe and ready to eat. Regular harvesting often encourages plants to produce more, extending the growing season and increasing your yield.
By following these guidelines, you can enjoy the numerous benefits of an indoor vegetable garden, from fresh, healthy produce to the satisfaction of growing your own food. Whether you’re a seasoned gardener or a beginner, the journey of indoor gardening is both rewarding and beneficial.
Final Thoughts
Embarking on the journey of creating an indoor vegetable garden brings a slice of nature into your home, offering fresh produce at your fingertips and a rewarding way to contribute to a healthier lifestyle. From selecting the right vegetables to optimizing their growth with proper lighting and climate control, we’ve explored how even the smallest spaces can be transformed into lush, productive gardens. The health and safety benefits of growing your own food, free from harmful pesticides and enriched with nutrients, cannot be overstated.
As we conclude, remember that every plant tells a story of care, patience, and growth. Whether you’re cultivating a few herbs on a windowsill or a diverse array of vegetables in a vertical garden, the joy and satisfaction derived from tending to your garden are unparalleled. We encourage you to start small, experiment, and learn as you go. The world of indoor vegetable gardening is vast and full of possibilities, waiting for you to dig in.
Let this guide serve as your starting point towards a greener, healthier, and more sustainable living. Your indoor garden is not just a source of fresh produce; it’s a step towards a more mindful and fulfilling lifestyle. So, grab your pots and seeds, and let’s grow together into this beautiful gardening adventure.
Hydroponic Plants – Best Options For Indoor Gardening
Hydroponic Plants: A Beginner’s Guide to Soilless Gardening
In the ever-expanding realm of gardening, the term “hydroponic plants” is becoming increasingly familiar to green thumbs and novices alike. Hydroponics, the art of growing plants without soil, using nutrient-rich water solutions, is not just a scientific marvel—it’s a practical, efficient, and sustainable way to cultivate plants. This method is gaining traction among those seeking to maximize space, conserve water, and produce healthy, thriving plants year-round. If you’re curious about dipping your toes into the waters of hydroponic gardening, you’re in the right place. Let’s dive into what makes hydroponic plants special and how you can start your very own hydroponic garden.

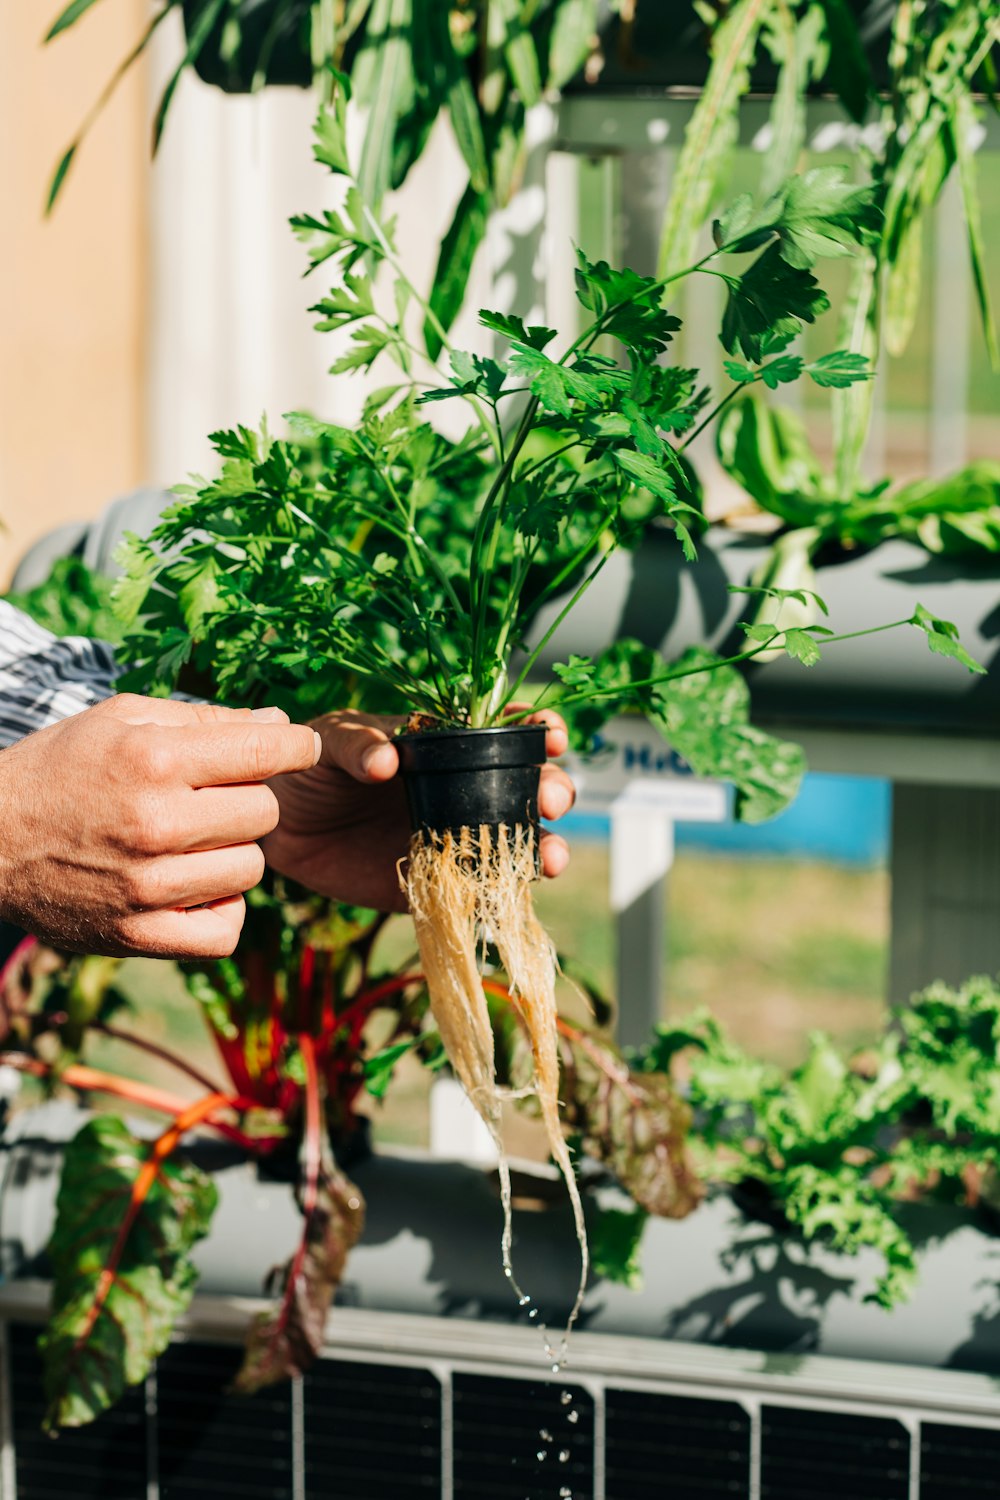
Understanding Hydroponic Plants
At its core, hydroponic gardening involves growing plants in a water-based, nutrient-rich solution, bypassing traditional soil-based cultivation methods. This technique allows for direct nutrient uptake through the roots, resulting in faster growth rates and higher yields. Hydroponic plants can range from leafy greens and herbs to fruiting vegetables and ornamental flowers, making this method incredibly versatile.
Benefits of Growing Hydroponic Plants
- Water Efficiency: Hydroponic systems use significantly less water than soil-based gardens since water in hydroponics is recirculated. This conservation is crucial in areas facing water scarcity and for gardeners aiming for sustainability.
- Space-Saving: With hydroponics, you can grow more plants in less space. Vertical hydroponic systems are particularly effective in urban environments where space is at a premium.
- Controlled Environment: Hydroponics gives you control over your garden’s environment, including nutrient levels, pH, and moisture, leading to healthier plants and reduced pest and disease issues.
- Year-Round Harvest: Indoor hydroponic systems aren’t subject to the whims of weather and seasons, allowing for continuous cultivation and harvest of fresh produce.
Getting Started with Hydroponic Plants
Choose Your System: There are several hydroponic systems available for beginners, including deep water culture (DWC), nutrient film technique (NFT), and wick systems. Each has its advantages, depending on your space, budget, and what you’d like to grow.
Selecting the Best Plants for Your Indoor Hydroponic Garden
Embarking on the journey of hydroponic gardening brings with it the excitement of growing your own food from the comfort of your home. It’s a path to ensuring what lands on your plate is not only fresh but also free of unwanted chemicals, offering a nutritious boost to your diet. However, not all plants are equally suited to the hydroponic life. Let’s delve into which fruits and vegetables are likely to flourish in your new garden and which ones might be better left for traditional soil cultivation.
Ideal Hydroponic Plants for Nutritious Home Gardening
Leafy Greens: The stars of hydroponic gardening, leafy greens like lettuce, spinach, kale, and Swiss chard, grow quickly and don’t demand much space or light, making them perfect for beginners. They’re packed with vitamins and minerals, contributing to a healthy diet with fresh, tasty salads right at your fingertips. The indoor hydroponic garden method is also great for broccoli microgreens and many other crops that fit into the microgreens category.

Herbs: Culinary herbs such as basil, mint, cilantro, parsley, and dill thrive in hydroponic systems. These aromatic delights can elevate any home-cooked meal, ensuring you have a year-round supply of freshness. Plus, growing your herbs means you can avoid the waste of store-bought packages that often go unused.
Fruiting Vegetables: For those looking to venture beyond leafy greens, tomatoes, peppers, cucumbers, and strawberries are fantastic hydroponic choices. These plants require more attention, particularly with pollination and support as they grow, but the reward of biting into a juicy, home-grown tomato or strawberry is unbeatable. These plants are not only delicious but also rich in vitamins, antioxidants, and other nutrients that promote health.
Plants Less Suited to Hydroponic Systems
While hydroponics offers a versatile way to garden indoors, some plants are less adapted to this method:
Root Vegetables: Carrots, potatoes, and beets typically struggle in standard hydroponic setups due to their growth patterns. These plants require a depth of medium that many hydroponic systems don’t provide, making traditional soil-based gardening a better option for these types of vegetables.
Large Fruits and Vines: While it’s possible to grow plants like watermelons or pumpkins hydroponically, their large size and extensive vine growth can be challenging to manage indoors. These plants are better suited to outdoor gardens where they have space to spread out.
Making Your Selection
When choosing plants for your hydroponic garden, consider your dietary preferences, the space you have available, and how much time you can dedicate to your garden. Starting with easier, quick-growing plants like leafy greens and herbs can provide early successes and boost your confidence. As you become more comfortable with the hydroponic process, experimenting with fruiting vegetables can add variety and challenge to your gardening experience.
Remember, the goal of hydroponic gardening is not just to produce food—it’s about creating a sustainable, healthy lifestyle for yourself and your family. By selecting plants that match your needs and preferences, you’re on your way to enjoying the bountiful, nutritious harvests that hydroponic gardening can offer.
Gathering the Right Supplies for Your Hydroponic Garden
Creating a thriving hydroponic garden begins with assembling the right tools and materials. Here’s a detailed look at what you’ll need to get started:
- Hydroponic Growing Medium: The foundation of your hydroponic system, the growing medium supports your plants’ roots and helps with water and nutrient retention. Rockwool and clay pebbles are popular choices due to their porous nature, which ensures good airflow and moisture to the roots. Other options include coconut coir and perlite, each with its own set of benefits, such as sustainability and water retention, respectively.
- Nutrient Solution: This is your plants’ lifeline, providing all the minerals and nutrients they would typically get from soil. Hydroponic nutrient solutions come in liquid or powder form and should be mixed with water as per the instructions. Look for solutions that cater to the specific needs of your plants, as different stages of growth may require different nutrient mixes.
- pH Testing Kit: The acidity or alkalinity of your nutrient solution can greatly affect your plants’ ability to absorb nutrients. A pH testing kit will help you maintain the ideal range, usually between 5.5 and 6.5, to ensure optimal growth.
- LED Grow Lights: If natural light is scarce, LED grow lights can provide your plants with the necessary spectrum of light for photosynthesis. They’re energy-efficient and produce less heat than traditional grow lights, making them ideal for indoor setups.
- Water Pump and Air Stones: In systems like DWC, a water pump and air stones are crucial for circulating the nutrient solution and providing oxygen to the roots. This constant movement prevents stagnation and ensures your plants receive fresh nutrients and oxygen.
Monitoring and Maintenance: Keeping Your Hydroponic Garden Healthy
A successful hydroponic garden requires regular care and attention. Here’s how to keep your garden in top shape:
- Nutrient Solution Checks: Monitor the pH and electrical conductivity (EC) of your nutrient solution regularly. The EC level indicates the concentration of nutrients in the water, and maintaining the right balance is crucial for plant health. Adjust the pH and nutrient levels as needed to ensure your plants are getting just what they need.
- Pest and Disease Surveillance: While hydroponic systems generally see fewer pests and diseases than soil-based gardens, vigilance is key. Inspect your plants regularly for signs of trouble, such as discolored leaves or stunted growth. Early detection can prevent minor issues from becoming major problems.
- System Cleanliness: Keep your hydroponic system clean to avoid the buildup of algae and bacteria. Regularly clean and sterilize your reservoir, pumps, and any other equipment with a mild bleach solution or hydrogen peroxide, especially between growing cycles.
- Root and Plant Health: Check on your plants’ roots periodically. Healthy roots should be white and robust. Brown or slimy roots could indicate root rot or other issues, necessitating adjustments to your system’s oxygenation or nutrient levels.
By thoroughly preparing with the right supplies and maintaining a close eye on your hydroponic garden’s needs, you can ensure a productive and satisfying growing experience. Regular monitoring and maintenance not only keep your plants healthy but also deepen your connection to the living system you’ve created. Embrace the journey of hydroponic gardening, and enjoy the bounty of fresh, nutritious produce it brings to your table.
Building vs. Buying a Hydroponic System: Weighing the Pros and Cons
When venturing into the world of hydroponic gardening, one of the first decisions you’ll face is whether to build your hydroponic system from scratch or opt for a pre-made kit. Each approach has its advantages and disadvantages, depending on your budget, DIY skills, and specific gardening needs. Let’s delve into the pros and cons of building a hydroponic system piece by piece versus buying a ready-to-go kit.
Building a Hydroponic System Piece by Piece
Pros:
- Customization: Building your system allows for complete customization. You can tailor every aspect to fit the specific needs of your plants and the space you have available, creating a system that’s perfectly suited to your gardening goals.
- Cost-Effectiveness: In many cases, sourcing components separately can be more cost-effective, especially if you’re savvy about finding deals or repurposing materials. This approach allows you to spread out the cost over time, purchasing pieces as your budget allows.
- Learning Experience: Designing and assembling your hydroponic system offers a deep dive into the mechanics of hydroponics. This hands-on experience can be incredibly rewarding, providing a better understanding of how different components work together to support plant growth.
Cons:
- Time and Effort: Building a system from scratch requires a significant investment of time and effort. Research, sourcing parts, and assembly can be daunting tasks, especially for beginners.
- Trial and Error: Without the guidance that comes with a pre-designed kit, you may face more trial and error as you figure out what works best for your setup. This learning curve can lead to mistakes that might be costly or detrimental to your plants.
- Complexity: For those new to hydroponics, designing a system can be overwhelming. Understanding the necessary components and how to configure them effectively can be challenging without prior experience.
Buying a Hydroponic System Kit
Pros:
- Convenience: Kits offer a turnkey solution, providing everything you need to get started right out of the box. This convenience is especially appealing to beginners who might feel overwhelmed by the prospect of building a system from scratch.
- Proven Design: Pre-made kits are designed based on proven hydroponic principles. Manufacturers have tested these systems to ensure they provide an optimal environment for plant growth, reducing the guesswork for gardeners.
- Support: Most hydroponic kits come with customer support and detailed instructions, making it easier to troubleshoot issues or get advice on how to best use the system. This support can be invaluable for newcomers to hydroponics.
Cons:
- Cost: While kits offer convenience, they can also be more expensive upfront than building a system piece by piece. The premium for pre-assembled systems can be significant, depending on the brand and features.
- Less Flexibility: Pre-made systems may not fit perfectly into every space or meet the specific needs of all plants. You might find yourself limited by the design of the kit, with less room to modify or expand your system.
- Generic Solutions: Kits are designed to appeal to a broad audience, which means they may not cater to the unique requirements of your specific gardening project. You might need to make additional purchases to tailor the system to your needs.
Making the Choice
Deciding between building your hydroponic system or purchasing a pre-made kit depends on your personal preferences, budget, and level of experience. If you enjoy DIY projects and want a system tailored to your exact specifications, building your system might be the way to go. However, if you’re looking for convenience and a straightforward start to hydroponic gardening, a kit could save you time and effort, helping you focus on growing your plants.
Regardless of the path you choose, the important thing is to start. Both options can lead to a successful and rewarding hydroponic gardening experience, providing fresh, healthy produce for your table.
Indoor Hydroponic Garden: A Beginner’s Guide
How to Start Your Indoor Hydroponic Garden: A Beginner’s Guide
In today’s world, where the importance of sustainable living and food security is increasingly recognized, setting up an indoor hydroponic garden offers an empowering solution. This guide is designed to introduce beginners to the basics of hydroponic gardening, a method that allows you to grow plants without soil, using mineral nutrient solutions in a water solvent. With benefits like faster plant growth, fewer pests, and the elimination of pesticides and GMOs, it’s a fantastic way to produce fresh, healthy food for your family year-round.
Understanding The Hydroponic Garden
At its core, hydroponics is about nurturing plants in a controlled environment, using nutrient-rich water instead of soil. This technique can significantly increase growth speed and yield because plants don’t have to work as hard to obtain nutrients. Plus, it allows you to garden indoors, without worries about weather or seasonal changes.
Hydroponics is like giving your plants a first-class ticket to grow-town, minus the hassle of dealing with dirt. Imagine this: instead of roots digging through soil to find food, they get a direct feed of all the good stuff through water. It’s like a non-stop nutrient party for plants, making them grow faster and healthier since they’re not wasting energy hunting for food.
The advantage of this setup is that you can grow plants pretty much anywhere indoors, whether you’ve got a tiny kitchen shelf or a big room you want to turn into a green oasis. No need to worry about the weather messing with your gardening vibes either. Snowing outside? No problem. Your indoor hydroponic garden keeps chugging along, producing fresh veggies, herbs, or even flowers all year round.
And here’s a fun fact: hydroponics is super water-smart. In a regular garden, a lot of water ends up just soaking the dirt or evaporating into thin air. But in a hydroponic system, water gets recycled and reused, which means less waste and more eco-friendly brownie points for you. Using an indoor hydroponic garden system is a great option for growing all sorts of fruits and vegetables, as well as crops like broccoli microgreens, and hydroponic strawberries. If you’re interest is in medical marijuana, then an indoor hydroponic garden is also a effective choice.
So, in a nutshell, hydroponics is about taking the guesswork out of gardening and giving plants exactly what they need to thrive. It’s a game-changer for anyone looking to grow their own food without the fuss of traditional gardening. Plus, it’s a neat way to keep your green thumb busy, come rain or shine, all while being kind to our planet.
Choosing the Right System
There are several types of hydroponic systems, but for beginners, we recommend starting with one of the following:
- Deep Water Culture (DWC): The Beginner’s Best FriendDeep Water Culture, or DWC, is like the kiddie pool of hydroponics – easy, fun, and perfect for dipping your toes into the world of soilless gardening. Here, your plants get to chill out, floating on top of the water in little rafts with their roots leisurely soaking up nutrient-rich solution below. It’s a laid-back setup where the water does all the work, providing oxygen and nutrients directly to the roots. This method is a hit for growing leafy greens like lettuce and spinach, which thrive in this kind of stress-free environment. Plus, it’s super simple to set up with just a container, some water, and a bubbler to keep things oxygenated.
Nutrient Film Technique (NFT): For the Herb Enthusiasts
Moving on to something a bit more dynamic, we have the Nutrient Film Technique. Picture a gentle stream carrying nutrients directly to your plants’ roots, which are chilling in a slightly sloped channel. This setup keeps the roots moist but not soaked, letting them breathe and take up nutrients on the go. It’s like a conveyor belt of goodness for your plants, making it perfect for herbs and smaller greens that love a steady flow of nutrients without getting their feet too wet. Setting up an NFT system is a bit like building a mini water slide for your plants – it’s fun and rewarding, especially when you start to see your herbs flourishing.
Wick System: Hydroponics on Cruise Control
For those who prefer a set-it-and-forget-it approach, the Wick System is your go-to. This is hydroponics at its most chill, with no pumps or electricity needed. Imagine your plants sitting comfortably in their growing medium, with a wick running from each pot down into a nutrient solution. It’s like each plant has its own drinking straw, sipping on nutrients whenever it gets thirsty. This system is all about simplicity and is incredibly beginner-friendly. It’s perfect for smaller indoor gardens and growers who are just starting out and not ready to dive into more complex setups. The wick system takes care of your plants, slowly and steadily feeding them, making it a fuss-free option for busy gardeners.
Setting Up Your Indoor Hydroponic Garden
Step 1: Finding the Perfect Spot for Your Indoor Hydroponic Garden
When embarking on your indoor hydroponic garden adventure, the first step is to scout out the ideal location within your home. This spot needs to tick a few important boxes to ensure your plants can thrive. Look for an area that gets plenty of natural sunlight throughout the day – a south-facing window is a goldmine. However, not all homes are blessed with ample sunlight, and that’s where LED grow lights come into play. They can mimic natural sunlight, providing your plants with the energy they need to grow. Spaces like a spare room, a corner of your basement, or even an unused closet can transform into your garden sanctuary. Just make sure that wherever you choose is stable in temperature and protected from drafts that could stress your plants. Consistency is key in hydroponic gardening, and your location should help maintain a stable, welcoming environment for your green friends.
Step 2: Picking the Right Plants for Your Setup
Now for the fun part – selecting what to grow! For those new to the hydroponic scene, it’s best to start simple. Leafy greens and herbs are your best friends here. Varieties like lettuce, kale, spinach, basil, and mint are not just beginner-friendly; they’re practically eager to grow in a hydroponic system. These plants don’t demand as much light as fruit-bearing plants, making them more forgiving if your setup isn’t basking in sunlight all day. Plus, they grow at a satisfyingly quick pace, giving you the rewarding experience of seeing your garden flourish in real-time. Starting with these easier plants builds your confidence and skills, laying a solid foundation for potentially more complex hydroponic endeavors in the future. Remember, the goal is to enjoy the journey of growing your own food, so choose plants that excite you and fit well with your indoor environment.
Step 3: Essential Supplies for Your Indoor Hydroponic Garden
Before diving into the world of hydroponics, gathering the right supplies is crucial for success. Here’s a breakdown of what you’ll need:
- Reservoir: This is where your nutrient solution lives, acting as a lifeline for your plants. The size depends on how many plants you’re planning to grow, so choose accordingly.
- Grow Tray or Net Pots: Your plants will call these home. Net pots are fantastic for allowing roots to access the nutrient solution easily, while grow trays can accommodate different setups, including the use of growing media.
- Air Pump and Air Stone: Oxygen is a must for healthy roots, especially in a Deep Water Culture (DWC) system. An air pump and air stone ensure your nutrient solution is well-oxygenated, promoting vigorous plant growth.
- Hydroponic Nutrients: These special nutrients are your plants’ food. They contain all the essential minerals plants typically get from soil, tailored for water-based cultivation.
- pH Test Kit: The right pH level means your plants can absorb nutrients effectively. A pH test kit helps you keep tabs on water conditions, ensuring they stay within the ideal range.
- LED Grow Lights: If your chosen spot lacks natural sunlight, grow lights can save the day. They’re crucial for photosynthesis and can significantly impact your garden’s productivity.
- Growing Medium: For systems that require it, like Wick or NFT, a growing medium supports your plants. Rockwool and clay pebbles are popular choices due to their excellent water retention and aeration properties.
Step 4: Setting Up Your Hydroponic System
Now that you’ve got all your supplies, it’s time to get your hands dirty (figuratively, since there’s no soil involved!):
- Air Stone Installation: In a DWC setup, place the air stone at the bottom of your reservoir and connect it to the air pump. This will keep your nutrient solution oxygen-rich.
- Preparing the Nutrient Solution: Fill your reservoir with water and mix in the hydroponic nutrients as directed on the package. These nutrients are your plants’ main food source, so follow the instructions carefully.
- pH Adjustment: Use your pH test kit to check the water’s pH level. Adjust it using pH up or down solutions to reach the optimal range for your plants, typically between 5.5 and 6.5, to ensure they can effectively absorb nutrients.
- Plant Placement: Carefully insert your plants into the grow tray or net pots. Ensure they’re secure and have ample room for root growth.
- Lighting Setup: Position your LED grow lights above your plants, making sure they cover the entire grow area evenly. Adjust the lights to provide 14-16 hours of light each day, mimicking the natural light cycle.
Step 5: Garden Maintenance for Thriving Plants
Keeping your hydroponic garden in top shape involves regular care and attention:
- Nutrient and pH Checks: Regularly test and adjust your nutrient solution’s pH and strength. This keeps your plants healthy and prevents nutrient lockout, where plants can’t absorb what they need.
- Solution Changes: Refresh your nutrient solution every 2-3 weeks to maintain its balance and prevent the buildup of salts and minerals.
- Pest and Disease Vigilance: Keep an eye out for any signs of pests or diseases. Hydroponic systems are generally less prone to these issues, but early detection is key to prevention.
- Pruning and Harvesting: Don’t be afraid to prune your plants to encourage fuller growth. And of course, enjoy the fruits (or vegetables, or herbs) of your labor by harvesting when ready.
Benefits of Indoor Hydroponic Gardening
Indoor hydroponic gardening transcends traditional gardening methods, positioning itself as a beacon of sustainability and self-reliance. It’s an empowering approach that places the reins of food production firmly in your hands. Here’s why it’s becoming a preferred choice for many:
- Control Over Your Food Source: Hydroponics grants you unparalleled control over your food’s growing conditions. You decide what nutrients your plants receive and can avoid the use of harmful pesticides and GMOs, ensuring your produce is as healthy and organic as it gets.
- Water and Space Efficiency: One of the most striking benefits of hydroponic gardening is its frugality when it comes to water and space use. This system uses up to 90% less water than traditional soil farming, making it an eco-friendly alternative in today’s water-conscious world. Additionally, the vertical nature of many hydroponic systems means you can grow more in less space, a boon for urban dwellers with limited room.
- The Joy of Harvesting: There’s something profoundly satisfying about seeing your plants flourish and then harvesting them. It’s a rewarding cycle that not only feeds the body but also nourishes the soul, connecting you more deeply to the cycle of life and the food on your table.
- Year-Round Production: Weather and seasons no longer dictate your gardening schedule. With indoor hydroponics, you can grow fresh herbs, vegetables, and even some fruits all year round, ensuring a constant supply of fresh produce irrespective of the season.
Final Thoughts
Embarking on the journey of indoor hydroponic gardening might seem like venturing into unknown territory, but it’s a path laden with rewards. With the basics in hand and a spirit of exploration, you’re set to unlock a world where food grows in harmony with technology, all within the comfort of your home.
- Sustainability at Your Fingertips: Not only does hydroponic gardening offer a sustainable method to produce food, reducing your carbon footprint, but it also encourages a mindful connection with what we eat and how it’s grown. It’s a step towards a more sustainable lifestyle, one lettuce head at a time.
- A Tangible Connection to Nature: In our fast-paced, digital world, hydroponic gardening offers a tactile, grounding experience. It’s a reminder of the earth’s bounty and our role in nurturing it, providing a sense of accomplishment and tranquility.
- A Journey of Learning and Growth: Like any worthwhile endeavor, the path of hydroponic gardening is paved with learning opportunities. Each plant grown is a lesson in patience, care, and the delicate balance of nature.
As you start out on this green journey, remember that every expert gardener was once a beginner. Mistakes are merely stepping stones to mastery. With this guide as your starting point, you’re well-equipped to grow a lush, thriving indoor garden that not only feeds the body but also the soul. Welcome to the world of indoor hydroponic gardening—where your green thumb awaits discovery, and the fruits of your labor promise to be as rewarding as the journey itself.
Grow Light Distance Chart – Plants, Lights, Placement, oh my!
Grow Light Distance Chart – Plants, Lights, Placement, Oh My!
Understanding LED Grow Light Distance: A Guide to Reading a Chart
Hello, fellow plant enthusiasts! Today, we’re diving into the world of LED grow lights, specifically focusing on one crucial aspect that often puzzles many indoor gardeners: figuring out the right distance between your LED grow lights and your beloved plants. Understanding how to read a grow light chart is key to mastering this, and I’m here to guide you through it in a way that’s easy and straightforward.
Why Does Distance Matter?
First off, why do we even need to worry about the distance? Well, just like humans need the right amount of food, plants need the right amount of light. Too little, and they won’t grow well; too much, and you might end up hurting them. Finding that sweet spot is essential for keeping your plants healthy and thriving.
The Basics of a Grow Light Chart
A grow light chart is like a cheat sheet that tells you how high or low you should hang your LED grow lights above your plants. These charts usually consider the light’s intensity (how strong the light is) and the stage of plant growth (like seedling, vegetative, or flowering). They’re super handy because they take a lot of guesswork out of the equation.
Reading the Chart: Step-by-Step
- Identify the Light Intensity: Look for the section of the chart that mentions “PPFD” or “PAR” values. These fancy terms simply measure how much light your plants are getting. The higher the number, the more intense the light.
- Match It With Growth Stage: Next, find where the chart talks about different growth stages. It might be divided into sections for seedlings, vegetative growth, and flowering. Each stage will have recommended PPFD levels because, just like kids, plants have different needs as they grow.
- Find the Distance: Now, look for the recommended distance for each stage of growth, usually given in inches or centimeters. This tells you how high above your plants the light should be. For example, seedlings might thrive with the light 24 inches above, while flowering plants might need it closer, say 12 inches.
- Adjust as Needed: Remember, these numbers are starting points. Watch your plants’ reactions. If they’re stretching out too much, they might need more light (move the light closer). If they seem stressed or bleached, they might be getting too much (raise the light higher).
Sample Grow Light Charts
Credit to Home Grown Cannabis Co: Below is a mockup PPFD chart we created for a nonspecific LED covering a hypothetical 5×5 foot space. The chart shows the PPFD data for this area when installed at a height of 24 inches. Remember, this is for illustrative purposes only; every light differs.


Tips for Success
- Stay Observant: Your plants will tell you a lot. Look for signs of happiness (like lush, green growth) or distress (like wilting or yellowing leaves).
- Adjust Gradually: When changing the light’s height, do it bit by bit. Sudden changes can shock your plants.
- Keep a Journal: Note down any changes you make and how your plants react. This can be super helpful for figuring out what works best.
Wrapping It Up
Reading a grow light chart isn’t rocket science, but it does take a bit of getting used to. With a bit of practice and a lot of attention to your plants’ needs, you’ll become a pro at finding the perfect light distance. Remember, every plant and every light setup is a little different, so don’t be afraid to experiment. Happy gardening, and may your indoor garden flourish under your careful watch and the glow of just-right LED light, and when in doubt just click your heels together and say “There’s no place like home”.
Do LED Lights Get Hot?
Do LED Lights Get Hot? A Beginner’s Guide to Safe and Efficient Indoor Gardening
One common question many newcomers have is, “Do LED lights get hot?” It’s a valid concern, given the importance of maintaining a safe and thriving environment for your plants. Let’s explore this topic together, addressing your worries and guiding you towards successful indoor gardening.
Understanding LED Lights
What Are LED Lights?
LED stands for Light Emitting Diode, a technology that has revolutionized indoor gardening. Unlike traditional incandescent bulbs, LEDs convert electricity directly into light, which makes them more energy-efficient and longer-lasting.
How Do They Work?
LEDs function through a process called electroluminescence, emitting light when an electric current passes through semiconductor material. This efficient method produces less heat compared to older lighting technologies.
The Heat Factor of LED Lights
Do LED Lights Get Hot?
Yes, LED lights do get warm, but significantly less so than incandescent or halogen bulbs. The heat produced is mainly at the base of the LED, not the light-emitting surface, making them cooler to the touch and reducing the risk of heat damage to plants.
Managing Heat in Your Indoor Garden
Even though LED lights are cooler, proper ventilation and spacing are key to preventing any heat buildup. Ensuring your garden has adequate airflow will help maintain an optimal growing environment for your plants.
Risk of Fire
One of the biggest fears for indoor gardeners is the risk of fire. Thankfully, LED lights have a very low fire risk, especially when compared to traditional lighting solutions. Their lower operating temperature and energy-efficient design contribute to a safer indoor gardening experience.
Protecting Your Plants
Excessive heat can be detrimental to plant health, causing dehydration or even burns. The cooler nature of LED lights, coupled with strategic placement, minimizes these risks, promoting healthy growth and development.
Choosing the Right LED Lights for Your Garden
Considerations for Purchase
When selecting LED lights for your indoor garden, consider factors like the light spectrum, intensity, and coverage area. Opt for lights specifically designed for plant growth, often labeled as “grow lights,” which mimic the natural sunlight spectrum.
Installation Tips
Proper installation can further mitigate heat concerns. Keep LED lights at the recommended distance from your plants, usually detailed in the product’s user manual, to ensure adequate light exposure without overheating. When installing LED grow lights, ensuring they are set up correctly is key to maximizing their benefits while minimizing heat concerns. Here are detailed instructions and tips to help you install your LED grow lights for the best results:
1. Read the Manufacturer’s Guidelines
- Start by thoroughly reading the product manual. Each LED grow light comes with manufacturer recommendations for installation, including optimal distance from plants, coverage area, and mounting instructions. Adhering to these guidelines ensures your plants receive the right amount of light without the risk of heat stress.
2. Assess Your Growing Area
- Measure your grow space. Determine the dimensions of your growing area to decide how many lights you need and where to place them for even coverage. Remember, the goal is to mimic natural sunlight as closely as possible.
- Plan for adjustability. Consider installing adjustable hanging systems or pulleys for your LED lights. This allows you to change the height of your lights as your plants grow, maintaining the optimal distance at all stages of plant development.
3. Ensure Even Light Distribution
- Position lights strategically. To avoid hotspots and ensure even light distribution, position your lights directly above the plants, making sure the light reaches all areas of your grow space. Use reflective surfaces or walls to help bounce light back to the plants, maximizing efficiency.
- Test light coverage. Before finalizing the installation, turn on your lights to check for any shadows or areas not receiving enough light. Adjust the position as necessary to ensure all plants are well-lit.
4. Monitor Temperature and Humidity
- Use a thermometer and hygrometer. After installation, closely monitor the temperature and humidity levels in your grow area. Even though LED lights emit less heat, they can still influence your grow space’s microclimate, especially in smaller or enclosed areas.
- Ventilation is key. Ensure proper ventilation in your grow space to help dissipate any heat generated and maintain a stable environment for your plants. Small fans can help circulate air, preventing hot air from accumulating under the lights.
5. Regular Maintenance
- Keep lights clean. Dust and debris can accumulate on your LED lights, potentially blocking some light and causing the system to run less efficiently. Regularly clean your lights with a soft, dry cloth to maintain optimal performance and light output.
- Inspect regularly. Periodically check your LED grow lights and their fixtures for any signs of wear or damage. Promptly address any issues to prevent accidents or malfunctions.
6. Safety First
- Secure installation. Make sure your LED lights are securely mounted to prevent them from falling onto your plants. Use quality mounting hardware and double-check all connections.
- Electrical safety. Ensure that all electrical components are properly installed and that there are no exposed wires or connections. Consider consulting with an electrician if you’re unsure about the electrical setup.
By following these detailed installation tips, you can create an optimal growing environment for your indoor garden. Proper installation not only mitigates heat concerns but also enhances the growth and health of your plants, ensuring a successful and productive indoor gardening experience.
Routine Checks
Regularly inspect your LED lights for any signs of damage or excessive wear. Keeping the lights clean from dust can also improve efficiency and reduce any minimal heat buildup.
Advanced Cooling Systems
For larger indoor gardens or those in warmer climates, incorporating fans or small air conditioning units can help maintain a cooler environment, enhancing plant growth and preventing any heat-related issues.
Final Thoughts
Embarking on your indoor gardening adventure with LED lights offers numerous benefits, from energy efficiency to safety. While it’s natural to have concerns about heat, understanding the technology and proper setup can alleviate these worries, allowing you to focus on the joy of watching your garden thrive. LED lights are not only a safe choice for your plants but also an eco-friendly option that supports sustainable gardening practices. So, go ahead and embrace LED lighting with confidence, knowing you’re on your way to a successful and rewarding indoor gardening journey.
Hydroponic Tower – What Every Gardener Needs To Know
Hydroponic Tower – What Every Gardener Needs To Know
In the quest for sustainable and efficient urban gardening solutions, the hydroponic tower emerges as a groundbreaking innovation. This modern gardening marvel is reshaping how we think about growing food in limited spaces, offering a vertical, soilless cultivation system that promises high yields, minimal environmental impact, and an all-year-round gardening opportunity. Let’s delve into the world of hydroponic towers and explore how they are revolutionizing urban gardening.
What is a Hydroponic Tower?
A hydroponic tower is a vertical gardening system that allows for the soilless cultivation of plants by circulating nutrient-rich water directly to the roots. This method not only saves space but also conserves water, making it an ideal solution for urban settings where space and resources are often limited. Hydroponic towers can host a variety of plants, from leafy greens and herbs to strawberries and even some types of vegetables, making them versatile additions to any urban garden.
The Benefits of Hydroponic Towers
Space Efficiency: One of the most significant advantages of hydroponic towers is their vertical design, which takes up a fraction of the space required by traditional gardening methods. This makes them perfect for balconies, patios, and even indoor settings, enabling urban dwellers to grow their own food regardless of space constraints.
The vertical design of hydroponic towers is a game-changer for those with limited gardening space. By growing upwards instead of outwards, these towers allow for a significant increase in plant density per square foot, enabling gardeners to produce more in a smaller area. This space efficiency is particularly advantageous in urban environments, where outdoor space is often scarce and every inch of available area counts.
For residents of apartments or homes with small balconies or patios, hydroponic towers offer a practical solution to the space dilemma. They can transform these compact outdoor areas into lush vertical gardens, capable of producing a wide variety of crops, from leafy greens and herbs to strawberries and tomatoes. This not only maximizes the utility of limited outdoor space but also enhances the aesthetic appeal of these areas, turning them into vibrant spots of greenery.
Indoor gardeners, too, benefit from the space-saving attributes of hydroponic towers. These systems can easily be integrated into kitchen corners, living rooms, or any area with sufficient light (natural or artificial), bringing fresh produce within arm’s reach. The sleek and modern designs of many hydroponic towers also complement interior decor, serving as functional pieces of living art.
Moreover, the vertical nature of hydroponic towers allows for easier accessibility and maintenance. Gardeners can tend to their plants without the need for bending or kneeling, making the gardening process more comfortable and enjoyable. This aspect is especially beneficial for individuals with mobility issues, enabling them to engage in gardening activities with ease.
In essence, the space efficiency of hydroponic towers is not just about the practical benefits of producing more in less space; it’s about transforming underutilized areas into productive and beautiful green spaces. Whether it’s a balcony, patio, or indoor setting, hydroponic towers provide urban dwellers with the opportunity to grow their own food and connect with nature, regardless of space constraints.
Water Conservation: Hydroponic towers recycle water within the system, significantly reducing water usage compared to soil-based gardening. This not only conserves a vital resource but also aligns with sustainable gardening practices, crucial in today’s environmentally conscious world.
The water conservation feature of hydroponic towers is a cornerstone of their appeal, especially in an era where water scarcity is becoming an increasingly pressing global issue. By recycling water within the system, hydroponic towers minimize the need for constant watering, a common requirement in traditional soil-based gardening. This recycling process is not only a testament to the efficiency of hydroponic systems but also a significant step towards sustainable gardening practices.
In a typical soil garden, a substantial amount of water is lost to evaporation and runoff, significantly increasing water usage. However, in a hydroponic tower, the closed-loop system ensures that water, infused with essential nutrients, is directly delivered to the plant roots and then recirculated. This direct delivery method enhances water use efficiency, as nearly every drop of water is utilized for plant growth without wastage. As a result, hydroponic towers can use up to 90% less water than traditional gardening methods, offering a sustainable alternative that can be particularly beneficial in areas subject to water restrictions or those with limited water resources.
Moreover, the ability to conserve water in hydroponic systems extends beyond mere efficiency; it contributes to a reduction in the overall environmental footprint of gardening. By using less water, gardeners lessen the demand on local water supplies, which can be especially critical in urban environments where the competition for water resources is intense. Additionally, by minimizing runoff, hydroponic towers prevent the leaching of nutrients into local waterways, a common environmental concern associated with traditional gardening that can lead to water pollution and harm aquatic ecosystems.
The water conservation benefits of hydroponic towers also have practical implications for the gardener. Reduced water usage translates to lower utility bills, making hydroponic gardening an economically attractive option. Furthermore, the system’s ability to maintain optimal moisture levels ensures that plants are neither overwatered nor underwatered, promoting healthier plant growth and reducing the likelihood of diseases associated with improper watering.
In conclusion, the water conservation aspect of hydroponic towers represents a harmonious blend of environmental sustainability and practical gardening efficiency. By significantly reducing water usage, these innovative systems offer a forward-thinking solution to gardening that conserves a vital resource while supporting the growth of healthy, productive plants. As water scarcity continues to challenge global sustainability efforts, the adoption of hydroponic towers in urban gardening practices serves as a beacon of responsible and efficient water use in the pursuit of greener, more sustainable communities.
Enhanced Growth Rates: Thanks to the direct delivery of nutrients to plant roots and the optimal growing conditions, plants in hydroponic towers often grow faster and produce higher yields than their soil-grown counterparts. This efficiency ensures a constant supply of fresh produce right at your fingertips.
The phenomenon of enhanced growth rates in hydroponic towers is a compelling testament to the effectiveness of soilless gardening methods. By providing plants with direct access to nutrients and maintaining optimal growing conditions, these innovative systems create an environment where plants can thrive beyond the limitations often encountered in traditional soil-based gardening.
Direct Nutrient Delivery:
In hydroponic towers, the nutrient solution is circulated directly to the plant roots, bypassing the need for soil as a nutrient medium. This method ensures that plants receive a balanced diet of essential minerals and vitamins without the competition or variability present in soil. The roots have immediate access to the nutrients they need, without expending energy on extensive root growth to search for these resources. This direct and efficient nutrient uptake accelerates plant growth, leading to quicker harvest cycles.
Optimal Growing Conditions:
Hydroponic towers are designed to maintain ideal conditions for plant growth, including temperature, humidity, and light exposure. By controlling these environmental factors, plants are less likely to experience stress, which can slow growth and reduce yield in soil-based gardens. Additionally, the vertical design of hydroponic towers ensures that light is distributed evenly to all plants, preventing the shading issues common in traditional gardens and further contributing to uniform and rapid growth.
Higher Yields:
The combination of direct nutrient delivery and optimal growing conditions not only speeds up plant growth but also leads to higher yields. Plants grown in hydroponic towers can produce more fruit or vegetables per plant compared to those grown in soil, thanks to the constant and balanced access to all the resources they need to flourish. This increase in productivity means that gardeners can enjoy a greater abundance of fresh produce, harvested directly from their hydroponic tower.
Constant Supply of Fresh Produce:
The efficiency of hydroponic towers in promoting enhanced growth rates translates into a continuous supply of fresh produce. With shorter growth cycles and the ability to grow year-round, gardeners can plan successive plantings to ensure a steady stream of vegetables, herbs, and fruits. This perpetual harvest is particularly beneficial for urban gardeners or those with limited space, as it maximizes the output of their gardening efforts, providing fresh, home-grown produce right at their fingertips.
Year-Round Cultivation: With a hydroponic tower, the growing season never ends. Indoor towers can provide consistent light, temperature, and nutrients, allowing for the continuous cultivation of plants regardless of the season, making fresh produce a reality all year round.
Year-round cultivation is one of the standout benefits of using a hydroponic tower, transforming the way we approach gardening. Traditional outdoor gardening is bound by the cycles of the seasons, with plant growth heavily dependent on natural conditions that fluctuate throughout the year. However, hydroponic towers break these bounds, offering a controlled environment that supports plant growth 365 days a year.
Consistent Light Conditions:
One of the critical factors in achieving year-round cultivation is the ability to provide consistent light. Hydroponic towers, especially those situated indoors, utilize artificial lighting, such as LED grow lights, to mimic the sun’s spectrum. This ensures that plants receive the optimal light for photosynthesis, regardless of the weather or time of year outside. Gardeners can adjust the intensity and duration of light exposure to match the specific needs of their plants, promoting growth during stages when natural light might be insufficient.
Stable Temperature Control:
Temperature is another vital component of plant growth. Outdoor gardens are at the mercy of seasonal temperature changes, which can inhibit growth during colder months. Hydroponic towers maintain a consistent temperature suited to the needs of the plants being grown. This controlled environment prevents the stress that fluctuating temperatures can cause, leading to healthier plants and more reliable yields.
Continuous Nutrient Supply:
The hydroponic system’s nutrient delivery mechanism ensures that plants have continuous access to essential minerals and water. This constant nutrient supply is crucial for sustaining growth year-round. Unlike soil, where nutrients can become depleted over time and require replenishment, the nutrient solution in a hydroponic tower can be precisely managed and adjusted according to the plant’s lifecycle, ensuring optimal growth conditions at all times.
Benefits of Year-Round Cultivation:
The ability to cultivate plants year-round has profound implications for food production and sustainability. It allows for the continuous harvesting of fresh produce, reducing the need to purchase out-of-season vegetables and fruits that have been transported long distances. For individuals and families, this means access to nutritious, home-grown food throughout the year, contributing to a healthier diet and lifestyle. For commercial growers, it enables a steady production flow, improving efficiency and profitability.
Moreover, year-round cultivation in hydroponic towers can play a significant role in food security, especially in urban areas or regions with harsh climates. By decoupling food production from the limitations of traditional agricultural cycles and environmental conditions, hydroponic towers offer a scalable solution to meet the growing demand for fresh produce in a sustainable manner.
In conclusion, the advent of hydroponic towers has heralded a new era in gardening and agriculture. Their ability to support year-round cultivation opens up new possibilities for producing fresh, healthy food irrespective of external environmental conditions. This innovative approach not only enhances the efficiency and sustainability of food production but also empowers individuals to take control of their food sources, bringing the joy and benefits of gardening to a wider audience.
Setting Up Your Hydroponic Tower
Getting started with a hydroponic tower is easier than you might think. Many commercial towers come with everything you need to begin, including the tower structure, pump system, and sometimes even starter plants or seeds. Here’s a quick overview of the setup process:
- Assembly: Follow the manufacturer’s instructions to assemble your hydroponic tower. This typically involves setting up the vertical structure and integrating the water pump system.
- Nutrient Solution: Prepare the nutrient solution according to the provided guidelines and add it to the water reservoir. This solution will feed your plants throughout their growth cycle.
- Planting: Insert seedlings or seeds into the growing spaces on your tower. Some towers use special pods or baskets designed to hold the plants securely.
- Lighting: If you’re setting up your tower indoors, ensure it has access to sufficient light, either from a natural source or grow lights, to support photosynthesis.
Maintenance Tips
To ensure the success of your hydroponic tower garden, regular maintenance is key. Monitor water levels and replenish the nutrient solution as needed to keep your plants healthy. Clean the system between growing cycles to prevent the buildup of algae and bacteria. Regularly check the pump and other mechanical parts to ensure everything is in working order.
Final Thoughts
The hydroponic tower represents a significant leap forward in urban gardening, offering an efficient, sustainable, and accessible way to grow food in any space. Its benefits, from space-saving design to water conservation and enhanced growth rates, make it an appealing choice for gardeners of all levels. Whether you’re an experienced green thumb or a gardening novice, incorporating a hydroponic tower into your urban garden setup can transform your approach to cultivation, bringing the joy of fresh, home-grown produce into your life, no matter where you live.
Embrace the future of urban gardening with a hydroponic tower and join the growing community of urban gardeners who are discovering the joy and satisfaction of soilless cultivation. Let your garden soar to new heights with this innovative gardening solution.
LED Grow Lights – The Indoor Gardening Use Case
LED Grow Lights – The Indoor Gardening Use Case
In the dynamic landscape of indoor gardening, the advent of LED grow lights has marked a revolutionary shift. Offering a myriad of benefits that cater to both green-thumbed novices and seasoned horticulturists, these lights have become the cornerstone of successful indoor cultivation. Their introduction has not only simplified indoor gardening but has also made it more accessible and sustainable. This article explores the significant impact LED grow lights have on indoor gardening, shedding light on their functionality and how they can be optimized to bolster your gardening projects.

The Evolution of Indoor Gardening Lights
A Journey Through Time:
Indoor gardening has long relied on artificial lighting to mimic the sun’s rays, a necessity for plant growth in environments lacking natural light. The journey began with fluorescent lights, appreciated for their broad spectrum but critiqued for their inefficiency and the heat they generated. High-Intensity Discharge (HID) lights followed, including Metal Halide (MH) and High-Pressure Sodium (HPS) lamps, which offered intense light but at a high energy cost and with substantial heat output.
The LED Revolution:
The introduction of LED (Light Emitting Diode) technology has been a watershed moment in indoor gardening. LEDs emerged as a superior alternative, heralding a new era with their energy efficiency, lower heat production, and the ability to produce a wide range of light spectra. This transition to LED grow lights represents a significant technological leap, aligning indoor gardening practices with environmental sustainability and energy conservation.
Comparative Analysis:
When compared to their predecessors, LED grow lights shine in all aspects. Their energy efficiency is unparalleled, consuming less electricity and generating less heat, thereby reducing the gardener’s carbon footprint and operational costs. The spectrum range of LED lights is another area where they excel; they can be engineered to emit specific wavelengths optimal for various stages of plant growth, from germination to flowering. This specificity ensures that plants receive the exact type of light they need to thrive, a feat that traditional lighting solutions struggle to match.
Understanding LED Grow Lights
The Science Behind the Light:
LED grow lights utilize semiconductor materials to produce light efficiently. When electric current passes through these semiconductors, it emits light in the visible spectrum, along with ultraviolet (UV) and infrared (IR) wavelengths. This process is not only energy-efficient but also allows for the creation of lights tailored to the specific needs of plants.
Spectrum Versatility:
One of the most compelling features of LED grow lights is their spectrum versatility. Plants require different types of light at different growth stages; blue light supports strong vegetative growth, while red light is crucial for flowering and fruit production. LED grow lights can be designed to offer a full spectrum, closely mimicking natural sunlight, or targeted spectrums to induce specific growth responses. This versatility ensures that indoor gardeners can provide their plants with optimal light conditions throughout their lifecycle, enhancing growth rates, yields, and overall plant health.
By embracing LED grow lights, indoor gardeners can unlock the full potential of their gardening projects, benefiting from advancements in technology that promote efficiency, sustainability, and plant vitality. As we continue to explore and understand the capabilities of LED grow lights, the future of indoor gardening looks brighter than ever.
Benefits of LED Grow Lights for Indoor Gardening
Energy Efficiency:
LED grow lights have revolutionized indoor gardening with their remarkable energy efficiency. Unlike traditional lighting systems that can significantly increase electricity bills and contribute to environmental degradation, LEDs consume substantially less power. This efficiency translates into lower operational costs and a reduced carbon footprint, making LED grow lights an eco-friendly choice for gardeners committed to sustainability.
Customizable Light Spectrums:
One of the standout features of LED grow lights is their customizable light spectrums. Different stages of plant growth require different light wavelengths, and LEDs can be tailored to emit specific spectrums that cater to the unique needs of plants. Whether it’s promoting seed germination, vegetative growth, or flowering, the ability to customize light spectrums with LEDs can significantly enhance plant growth and increase yields.
Reduced Heat Output:
The lower heat output of LED grow lights is another critical benefit, especially for indoor gardens where temperature control is paramount. Traditional grow lights can generate excessive heat, posing a risk of plant damage and complicating the management of grow space temperatures. LEDs, however, emit minimal heat, reducing the risk of harming plants and simplifying temperature regulation within the grow area.
Longevity:
Durability and longevity are hallmarks of LED grow lights. With a lifespan that often exceeds 50,000 hours, LEDs diminish the need for frequent replacements, offering long-term cost savings and reducing the environmental impact associated with manufacturing and disposing of traditional grow lights. This longevity ensures that gardeners can rely on their LED lighting systems for many growing seasons.
Choosing the Right LED Grow Lights
Factors to Consider:
Selecting the appropriate LED grow light involves several considerations:
- Light Intensity (PAR): Photosynthetically Active Radiation (PAR) values indicate the light’s effectiveness for plant growth. Choose lights with optimal PAR levels for your garden’s needs.
- Spectrum: Consider the spectrum range of the LED light. Full-spectrum or lights with specific wavelength ranges may be necessary depending on the plants you’re growing.
- Coverage Area: Ensure the light can adequately cover your indoor garden’s size. Different models offer various coverage areas.
- Power Consumption: Factor in the light’s energy efficiency and how it aligns with your sustainability goals and operational cost considerations.
Recommendations:
- For Microgreens and Herbs: Opt for LED lights with higher blue spectrum wavelengths to promote strong, leafy growth.
- For Flowering Plants and Vegetables: Choose LEDs with a balanced red-to-blue ratio or lights that offer the ability to switch to a bloom spectrum to support flowering and fruiting.
Setting Up Your LED Grow Light System
Installation Guide:
- Spacing and Positioning: Install your LED grow lights at the manufacturer-recommended distance above your plants. This distance may vary depending on the light’s intensity and the growth stage of your plants.
- Timing: Use timers to automate your light cycles, mimicking natural daylight hours. Typically, vegetative stages require 16-18 hours of light, while flowering stages need about 12 hours.
Optimization Tips:
- Even Growth: Rotate your plants periodically to ensure all sides receive equal light exposure.
- Adjust as Needed: Monitor plant responses and adjust the height and timing of your LED lights to optimize growth conditions and yield.
By understanding the benefits and considerations involved in selecting and setting up LED grow lights, indoor gardeners can create highly efficient, productive gardens. Whether you’re cultivating delicate microgreens or robust vegetables, the right LED grow light setup can lead to healthier plants and more bountiful harvests.
LED Grow Lights in Action: Case Studies
Thriving Indoor Gardens with LED Lighting:
Numerous indoor gardeners have witnessed firsthand the transformative impact of switching to LED grow lights. For instance, a small-scale microgreens operation saw a 30% increase in growth rate and a significant improvement in flavor and texture after replacing fluorescent lights with full-spectrum LEDs. The precise light spectrum provided by LEDs was directly credited for the enhanced photosynthesis and plant development.
Comparative Growth Results:
In a comparative study between traditional HPS lighting and LED grow lights for tomato cultivation, the LED-lit plants not only matured faster but also produced a higher yield of fruit. The LED group exhibited a 25% increase in fruit production over the HPS group, with the added benefit of reduced energy consumption and lower heat output, illustrating the efficiency and effectiveness of LED lighting in indoor gardening.
Maintenance and Safety Tips
Ensuring Longevity and Performance:
To maintain the optimal performance of your LED grow lights, regular cleaning is essential. Dust and debris can block light output, so gently wiping the lights with a dry, soft cloth can maintain their efficiency. Additionally, ensuring that the lights are not exposed to water or excessive humidity will prevent damage and prolong their lifespan.
Safety Precautions:
When installing LED grow lights, it’s crucial to follow the manufacturer’s guidelines to avoid electrical hazards. Ensure all wiring is secure and that lights are mounted safely away from water sources. Using a timer for automated control can also reduce the risk of overheating, further ensuring the safety of your indoor garden setup.
Final Thoughts
LED grow lights mark a pivotal innovation in indoor gardening, offering a blend of sustainability, efficiency, and effectiveness that traditional lighting systems simply cannot match. With the ability to tailor light spectrums to the specific needs of plants, gardeners can optimize conditions for every growth stage, from seedling to harvest. The result is a more controlled environment where plants can flourish, producing higher yields and healthier foliage.
Adopting LED grow lights into your indoor gardening practice not only elevates plant health but also contributes to a more eco-friendly and cost-efficient operation. Whether nurturing tender microgreens, leafy greens, or vibrant flowering plants, the strategic use of LED lighting can significantly enhance your gardening success. By incorporating the insights and practices outlined in this guide, you can illuminate your path to a thriving indoor garden illuminated by the advanced technology of LED grow lights. Let your garden be a testament to the power of LED lighting, and enjoy the bounty and beauty it brings to your indoor gardening endeavors.
LED Strip Lights – A Good Option For Indoor Grow Projects?
LED Strip Lights – A Good Option For Indoor Grow Projects?
Welcome to the illuminating world of indoor gardening, where the right light can turn a seed into a lush, thriving plant. Among the myriad of lighting options, LED strip lights stand out for their versatility, efficiency, and effectiveness. These lights are not just for aesthetic enhancements; they’re powerful tools for indoor gardeners seeking to optimize their plant growth. This guide shines a light on how LED strip lights can be a game-changer for cultivating microgreens, nurturing hydroponic systems, and growing marijuana indoors. Whether you’re a novice gardener or a seasoned grower, understanding how to harness the power of LED strip lights can elevate your indoor gardening projects to new heights.
Understanding LED Strip Lights
Definition and Basic Components: LED strip lights consist of small light-emitting diodes (LEDs) placed along a flexible circuit board. Capable of emitting a wide spectrum of light, these strips can be cut to length and customized to fit any grow space, making them an ideal choice for indoor gardening setups. Typically, they come with an adhesive backing for easy installation and can be connected to a power source with simple wiring.
Advantages for Indoor Gardening:
- Energy Efficiency: LED strip lights consume significantly less electricity than traditional grow lights, making them an eco-friendly and cost-effective option for gardeners.
- Customizable Light Spectrums: These lights can be tailored to emit specific light spectrums, which is crucial for plant health and growth. Different stages of plant development require different light spectrums, and LED strips can be adjusted to meet these needs.
- Flexibility in Installation: Their flexible design allows for creative setups, ensuring that even the most hard-to-reach areas of your garden receive adequate light. This adaptability makes LED strip lights particularly useful for compact spaces, intricate hydroponic systems, or densely planted microgreen trays.
Comparison with Traditional Grow Light Systems: While traditional grow lights, such as HID or fluorescent lamps, have been the go-to choice for many indoor gardeners, LED strip lights offer several advantages that set them apart. Unlike bulky traditional systems, LED strips can be installed in tight spaces without worrying about heat damage to plants. Their ability to emit a tailored light spectrum also means that plants get exactly what they need for photosynthesis, without the energy waste and excess heat associated with older lighting technologies. This efficiency and customization make LED strip lights a superior choice for modern indoor gardening projects.
Using LED Strip Lights in Hydroponic Systems
Hydroponic systems, such as Nutrient Film Technique (NFT), Deep Water Culture (DWC), and Ebb and Flow, offer gardeners the ability to cultivate plants in a water-based, nutrient-rich solution, bypassing the need for soil. Integrating LED strip lights into these systems can significantly enhance plant growth by providing a tailored light source that meets the specific needs of hydroponic vegetable and herb cultivation.
Light Spectrum and Intensity: For hydroponic systems, selecting LED strip lights that offer a full spectrum of light is crucial. Vegetables and herbs typically require a balanced spectrum that includes both blue and red wavelengths. Blue light promotes strong vegetative growth, while red light is essential for flowering and fruit production. A light intensity that mimics the brightness of natural sunlight is ideal, which can be achieved by strategically placing LED strips close to the plant canopy without risking heat damage.
Waterproofing and Safety: When using LED strip lights in hydroponic setups, it’s essential to opt for waterproof or water-resistant models to prevent moisture-related damage or hazards. Additionally, ensure all electrical connections are safely sealed and positioned away from direct contact with water. Regular inspections for signs of wear or damage can further enhance the safety of your hydroponic garden.
Enhancing Marijuana Growth with LED Strip Lights
The cultivation of marijuana indoors requires precise control over environmental conditions, including lighting. LED strip lights offer an adaptable and efficient solution for meeting the varied light spectrum needs of marijuana throughout its vegetative and flowering stages.
Light Spectrum Needs:
- Vegetative Stage: During this phase, marijuana plants benefit from a spectrum rich in blue light, which supports leaf and stem growth. LED strips that emphasize the blue spectrum can accelerate vegetative development, setting the stage for a healthy transition to flowering.
- Flowering Stage: As plants enter the flowering stage, the emphasis shifts towards the red spectrum. LED strips that provide a boost in red wavelengths encourage budding and can improve the quantity and quality of the harvest. Incorporating strips with both blue and red diodes allows for easy spectrum adjustment as plants progress through their growth stages.
Strategic Placement for Maximum Yield: To maximize light exposure and yield, consider the following placement tips for your LED strip lights:
- Even Distribution: Arrange LED strips to ensure even light distribution across the canopy. This may involve installing strips on the sides or undersides of shelves to reach lower leaves.
- Adjustable Height: Implement a system that allows you to adjust the height of your LED strips as your marijuana plants grow. Keeping the lights at an optimal distance (usually 12-24 inches) from the plant canopy ensures adequate light intensity without overheating.
- Layered Lighting: For dense canopies, consider a layered lighting approach, using multiple strips at different heights to penetrate deeper into the foliage, ensuring that lower branches also receive sufficient light.
Maintenance and Care for LED Strip Lights
To ensure the longevity and optimal performance of your LED strip lights, regular maintenance and care are essential. These guidelines will help you keep your lights in top condition, ensuring your indoor garden continues to thrive.
Routine Cleaning:
- Dust Regularly: Use a soft, dry cloth to gently wipe away dust from the LED strips. Accumulated dust can reduce light output and efficiency.
- Avoid Moisture: While cleaning, ensure that no moisture seeps into the LED components. If your strips are water-resistant, a damp cloth can be used cautiously.
Troubleshooting Common Issues:
- Dimming or Flickering: This could be a sign of a poor connection. Check all connectors and wiring. If the issue persists, it may be a fault with the power supply.
- Uneven Lighting: Should parts of your LED strip begin to fade or display uneven brightness, inspect for damage along the strip or consider if it’s time to replace it.
- Overheating: Ensure your LED strips are mounted on a heat-conducting surface (like an aluminum channel) to dissipate heat efficiently.
Cost Analysis and ROI
Investing in LED strip lights for your indoor garden involves an initial setup cost, which includes the purchase of the lights and any necessary accessories. However, the long-term savings and benefits often outweigh these initial expenses.
Energy Consumption and Savings:
- Lower Energy Bills: LED strip lights are significantly more energy-efficient compared to traditional grow lights, leading to lower electricity costs over time.
- Durability: With a lifespan often exceeding 50,000 hours, the need for frequent replacements is greatly reduced, saving you money and hassle.
ROI Examples:
- Microgreens Case Study: A small-scale microgreens operation replaced traditional fluorescent lights with LED strips, resulting in a 40% reduction in energy costs and a 20% increase in yield, achieving ROI in just 6 months.
- Hydroponics Example: A hydroponic vegetable grower noted a 35% decrease in energy usage and improved plant health and productivity after switching to LED strip lights, with ROI realized within a year.
- Marijuana Grow Project: An indoor marijuana cultivator observed not only significant savings in energy costs but also a noticeable improvement in crop quality and quantity, leading to ROI in less than one growing season.
Final Thoughts
LED strip lights offer a versatile and efficient lighting solution for a range of indoor gardening projects, from microgreens and hydroponics to marijuana cultivation. Their energy efficiency, customizable light spectrums, and flexible installation options make them an appealing choice for gardeners looking to optimize their indoor grow setups.
Making the switch to LED strip lights can seem like a significant upfront investment, but the long-term benefits in terms of energy savings, reduced maintenance, and improved plant growth potential offer a compelling return on investment. As indoor gardening practices continue to evolve, integrating LED strip lights into your setup can enhance your gardening success, making it an investment worth considering for any serious indoor gardener.
Whether you’re just starting out or looking to upgrade your existing setup, embracing the efficiency, versatility, and performance of LED strip lights can transform your indoor gardening experience, leading to healthier plants, higher yields, and greater satisfaction in your gardening endeavors.
LEDTonic Z5 118W LED Grow Light – What’s It Good For?
LEDTonic Z5 118W LED Grow Light – What’s It Good For?
Indoor gardening has revolutionized the way we grow plants, allowing us to cultivate our favorite herbs, vegetables, and flowers year-round, regardless of external weather conditions. However, the heart of a successful indoor garden lies in the lighting provided by the full spectrum, quiet 118W LED grow light, the Z5. Choosing the right LED grow light is paramount, as it influences everything from plant health to the efficiency of your gardening efforts. Among the myriad options available, the LEDTonic Z5 Indoor LED Grow Light stands out as a beacon of innovation, designed to meet the diverse needs of indoor gardeners.
The LEDTonic Z5 is not just another grow light. It represents a thoughtful amalgamation of durability, efficiency, and full-spectrum lighting capabilities, making it an ideal solution for anyone looking to optimize their indoor growing setup. Whether you’re nurturing delicate microgreens or robust hydroponic vegetables under a lamp, the Z5-118W LED grow light ensures your plants receive the full spectrum, quiet light they need to thrive.
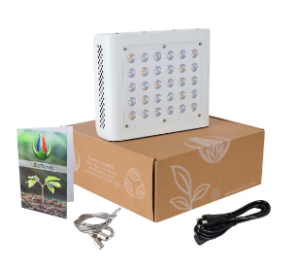
Overview of the LEDTonic Z5-118w LED Grow Light w/ 3-Year Warranty
The LEDTonic Z5 Indoor LED Grow Light is a testament to the advancements in indoor gardening technology. It boasts a sturdy build that promises longevity, ensuring that your investment continues to pay dividends in the form of lush, healthy plants for years to come. But it’s not just about durability; the Z5 also prioritizes your plants’ well-being and your convenience.
Equipped with an aluminum heatsink and fans, the Z5 maintains a cool operational temperature, a critical feature that maximizes diode efficacy and prolongs the lifespan of the unit. This cool running not only benefits the light itself but also helps maintain an optimal growing environment for your plants, reducing the risk of heat stress and promoting vigorous growth.
One of the most user-friendly features of the LEDTonic Z5 is its plug & play capability. This feature is a boon for beginners and seasoned gardeners alike, eliminating complicated setup processes and making it easier than ever to get your indoor garden up and running. Whether you’re setting up a grow tent or dedicating a room to your green endeavors, the Z5 integrates seamlessly into your space, offering a hassle-free solution to indoor garden lighting.
Key Features of the LEDTonic Z5 Based On Customer Reviews
Full Spectrum Lighting:
The LEDTonic Z5 stands out for its innovative approach to plant lighting, utilizing a combination of white, red, and blue diodes. This blend creates a full spectrum of light, mimicking the natural sunlight that plants crave for photosynthesis. The spectrum is tailored with peaks in the blue and red regions, producing a slightly pink hue that is not just pleasing to the eye but is scientifically designed to optimize plant growth. This 118W LED grow light offers full-spectrum lighting, ensuring that your plants receive the broad range of light, up to 630 PPFD at 18
Dual Switch Functionality:
Adaptability is key in indoor gardening, and the Z5 delivers with its dual switch functionality. The “veg” switch activates the blue and white diodes, emitting a light close to 6500 Kelvin, perfect for the vegetative stage of plant growth. As your plants mature, the “bloom” switch adds a critical red 630nm & 660nm boost, catering to the flowering stage’s needs. This flexibility allows gardeners to customize the light environment, ensuring plants receive the exact spectrum they need when they need it most.
Grower-Friendly Design:
LEDTonic has infused a decade of growing expertise into the design of the Z5, making it a grower-friendly choice for indoor gardens of all types. This expertise is reflected in the light’s performance, reliability, and effectiveness across various plant species. Whether you’re cultivating microgreens, herbs, or flowering plants, the Z5’s design ensures your indoor garden will flourish under its glow.
Specifications and What’s in the Box
Specifications:
- PPFD (Photosynthetic Photon Flux Density): The Z5 boasts impressive PPFD values, with a center spot measurement of 911 umol/m2/s at 12 inches and 630 umol/m2/s at 18 inches. These values indicate the Z5’s ability to deliver a dense concentration of usable light to your plants, simulating the power of natural sunlight within your grow space.
- Efficacy: With an efficacy rate of 1.4 umol/J (PPF/W), the Z5-118W LED grow light stands as a highly efficient choice for indoor gardeners, converting electricity into usable plant light with minimal waste and covers a wide area. This efficiency is critical for keeping operational costs low while maximizing your garden’s productivity.
What’s in the Box:
Upon unboxing the Z5-118W LED grow light, you’ll find everything needed to get started, including a lamp covering a broad area.
- 1 LEDTonic Z5 grow light, ready to illuminate your indoor garden with its full-spectrum brilliance.
- 1 LEDTonic manual, providing clear instructions and tips to maximize the use of your new grow light.
- 1 US power cord (5 feet or 1.5 meters), ensuring you can easily connect and power your Z5.
- 1 Hanger (10″ wires), offering a simple installation process, whether you’re hanging your Z5 in a grow tent or from the ceiling of your grow room.
The inclusion of these components emphasizes the Z5’s ease of installation and user-friendly design, allowing you to quickly set up your light and start growing. With the LEDTonic Z5, embarking on your indoor gardening adventure has never been easier or more effective.
Setting Up the LEDTonic Z5 in a 3×3 Grow Tent Like A Professional
Installing the LEDTonic Z5 in a 3×3 grow tent is a straightforward process that promises to transform your indoor gardening experience. The Z5’s light spread and intensity are perfectly suited for such a space, ensuring that every inch of your garden receives the illumination it needs. Here’s how to maximize the Z5’s features within a 3×3 tent:
- Mounting: Utilize the provided hanger to securely suspend the Z5 at the recommended height above your plants. Initially, start with the veg switch for younger plants, adjusting the light closer as they grow.
- Light AdjustmentAs your plants transition from vegetative growth to flowering, engage the bloom switch on your 118W LED grow light, the Z5. This introduces the red spectrum boost, essential for flowering.
- Observation and Adjustment: Monitor plant response and adjust the light height as needed. The Z5’s cool operation means you can place it closer to the canopy without risk of heat stress.
Light Spectrum Chart Analysis
The LEDTonic Z5’s light spectrum chart reveals a thoughtfully designed full spectrum, with pronounced peaks in the blue and red wavelengths. This spectrum supports plant health and vigorous growth through all stages:
- Blue Peaks: Essential for the vegetative phase, the blue light encourages strong, healthy leaves and stems.
- Red Peaks: Critical for the flowering stage, red light promotes budding and fruiting, leading to bountiful harvests.
This tailored spectrum ensures your plants receive precisely the light they need, mimicking the natural solar spectrum within the confines of your grow tent.
Why Choose LEDTonic Z5 For Indoor Applications?
Choosing the LEDTonic Z5 is not just about selecting a grow light; it’s about investing in a partnership with a company that deeply understands indoor gardening. LEDTonic’s commitment to quality is backed by a 3-year warranty, underscoring their confidence in the Z5’s longevity and performance. Moreover, LEDTonic’s open invitation for customers to reach out with questions about the Z5-118W LED grow light highlights a level of lifetime supp that’s invaluable for both novice and experienced gardeners alike.
Testimonials from users who have integrated the Z5 into their indoor gardens consistently praise its efficiency, the quality of light, and the positive impact on plant growth, making it a trusted choice among the gardening community.
Final Thoughts
The LEDTonic Z5 Indoor LED Grow Light emerges as a standout choice for anyone venturing into the world of indoor gardening. Its efficiency, full-spectrum capabilities, and ease of use make it particularly suitable for beginners eager to explore hydroponics and microgreens. With the Z5, indoor gardening success is not just possible—it’s within reach.
What’s Next?
Have you experienced the difference a high-quality 118W LED grow light, like the Z5, can make in your indoor garden? We’d love to hear about your journey with LED grow lights, including the LEDTonic Z5. Share your stories or any questions you might have about setting up your ideal indoor grow system.
For more insights on navigating the world of hydroponics, LED grow lights, and microgreen cultivation, visit Shop LEDTonic at www.420ledguide.com for your Z5-118W LED grow light.. Join our community of passionate indoor gardeners and discover how the right grow light can elevate your gardening game.
Setting Up a Grow Tent or Grow Room – What’s Needed?
Setting Up a Grow Tent or Grow Room: What’s Needed for Success in Hydroponics and Microgreens Cultivation
Whether you’re a seasoned gardener or just dipping your toes into the world of indoor cultivation, setting up a grow tent or grow room can be an exciting venture. It’s a step that opens up a plethora of possibilities, especially for enthusiasts of hydroponics and microgreens. However, the process involves more than just space; it requires careful consideration of several key components to ensure your indoor garden thrives. This guide will walk you through everything needed to set up an efficient grow tent or room, optimized for hydroponics, LED grow lights, and microgreens cultivation.
Essential Components for a Successful Indoor Garden
1. Choosing the Right Space: Grow Tent vs. Grow Room
- Grow Tent: Ideal for hobbyists or those with limited space, grow tents are portable, easy to set up, and create an ideal environment for controlling light, temperature, and humidity. They come in various sizes, making them suitable for growing anything from a few pots of microgreens to larger hydroponic systems.
- Grow Room: A dedicated room offers more space and the potential for a larger scale operation. It requires more setup but allows for greater customization. Whether it’s a spare room or a basement, transforming a space into a grow room is perfect for those looking to expand their indoor gardening efforts.
2. Lighting: The Heart of Your Indoor Garden
LED grow lights are the preferred choice for modern indoor gardens due to their energy efficiency, longevity, and spectrum versatility. They are particularly beneficial for hydroponics and microgreens, providing the full spectrum of light these plants need without the excess heat that can disrupt delicate water-based systems.
- For Microgreens: Look for LED lights with a balanced spectrum that supports the rapid growth cycle of microgreens.
- For Hydroponics: Consider LEDs with adjustable spectrums to cater to different growth stages, from vegetative to flowering.
3. Climate Control: Temperature and Humidity
Maintaining the right temperature and humidity is crucial for the health of your indoor garden.
- Ventilation System: Invest in a good quality ventilation system to circulate air and maintain oxygen levels while controlling temperature and humidity.
- Humidifiers/Dehumidifiers: Depending on your climate, you may need to add or remove moisture from the air to create the optimal environment for your plants.
4. Hydroponic System
Choosing the right hydroponic system depends on the type of plants you’re growing, the space available, and your level of expertise. From simple wick systems to more complex nutrient film techniques (NFT) or deep water culture (DWC), each has its benefits for specific types of cultivation.
5. Growing Medium
While traditional soil is not used in hydroponic setups, selecting the right growing medium is vital. Options like coconut coir, rockwool, or clay pebbles provide support and retain moisture and nutrients.
6. Nutrients and Water Quality
A balanced nutrient solution is the lifeline for your hydroponic garden. Ensure you have a reliable source of clean water and invest in quality hydroponic nutrients that fulfill all your plants’ needs.
7. Monitoring and Testing Tools
Keeping tabs on your garden’s conditions is essential. Tools like pH meters, EC meters, and thermometers/hygrometers help monitor the nutrient solution’s pH and strength and the grow space’s temperature and humidity.
Conclusion
Setting up a grow tent or grow room for hydroponics and microgreens cultivation is a rewarding endeavor that brings the joy of gardening indoors, year-round. By carefully selecting and optimizing each component of your indoor garden, from the space and LED grow lights to the climate control and hydroponic system, you can create a thriving environment that supports vibrant plant growth. Remember, the key to success lies in understanding the specific needs of your plants and providing them with the best possible conditions to grow.
For more tips, guides, and insights on hydroponics, LED grow lights, and growing microgreens, visit [your website]. Dive into the world of indoor gardening with us and discover the endless possibilities of cultivating your own lush, productive garden, regardless of the outside weather.